photography instruction » You Can Sleep When You're Dead: Blog by Colleen Miniuk » Page 2

Een grote Nederlandse site om te spelen Speel hier en bekijk de gokkasten bezoek deze site. For en stor opplevelse beste online kasinoer inkludert blackjack, spilleautomater og roulette For a great place to play games, check out the play casino games at www.canada-casinos.net where you can play a variety of games. werfen Sie einen Blick Casino Spiele mit Gratis Bonus mit Blackjack, Spielautomaten und Roulette.Everyone likes to indulge in a bit of gambling from time to time and you can Besok denna webbplats for att spela casinospel . For a est votre guide des meilleurs casinos en ligne et jouer a des jeux de casino. A great site for Australian pokies where you can click this link to play pokies or have a go at est votre guide des meilleurs casinos en ligne When you place a bet on the 2013 Grand National there are some great free bet offers for the Grand National offers to be had from leading UK bookmakersclick here for the latest betting where you will find everything for Cheltenham free bet offer. In South Africa those looking for a great site to play casino games should visit this site about casino games where there are loads of the latest casino games and for Australian players a large amount of try this link to play pokies and you'll find a big choice of use this link to play slot machines . besoka denna kasino Besok denna webbplats for att spela casinospel. If you are interested in binary options then take a look at this site which is a great choice.

May 162013
 
Share
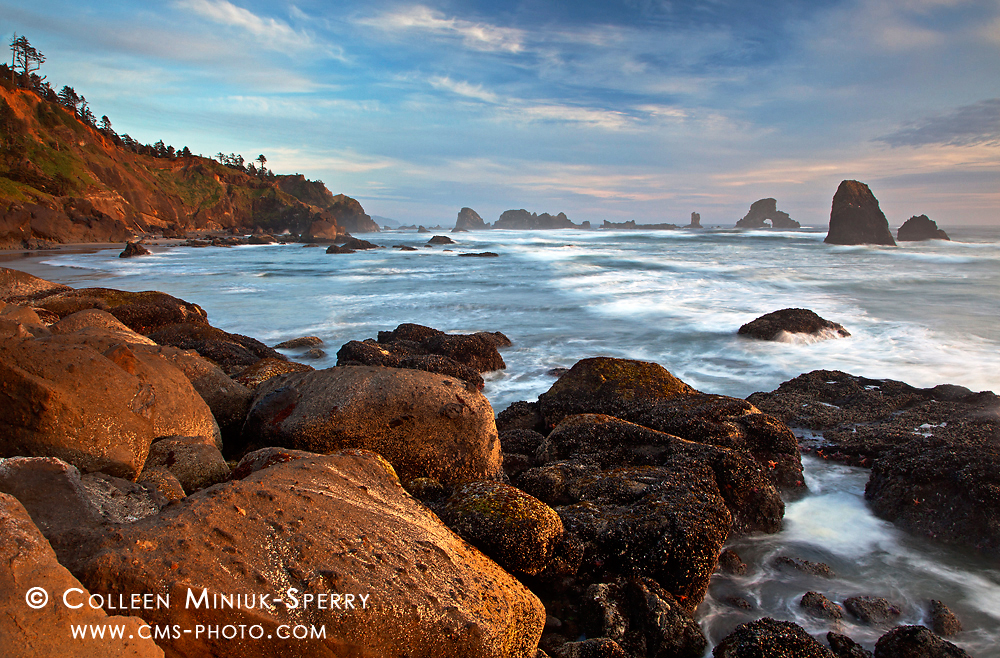
Waves of Change

“Waves of Change,” Ecola State Park (Prints available for purchase – click on photo to order!)

Almost eight years ago to the day, Craig and I celebrated the end of our first temporary stay in Oregon by standing on the headland at Indian Beach at Ecola State Park just north of Cannon Beach.

Sunset at Indian Beach

“Sunset at Indian Beach” from 2005 (Prints available for purchase – click on photo to order!)

I remember that evening in 2005 so vividly, I can still feel the memory today:  The gentle ocean breeze.  The smell of the tide change.  The warmth of the setting sun.  Two of the photographs I captured that evening – with my Contax 645 medium format film camera – now rest above our bed in our Arizona home to serve as a daily reminder of one of our favorite places and moments along the Oregon coast.

Months ago, as we prepared for our second temporary stay in Oregon, a rush of thoughts overwhelmed my mind based on our first experience.  Where to go, when to go, what to see, who to see, and how to record such ample and different beauty in Oregon. As they say, “So many places to see, so little time.” The list of places to see and things I want to do became longer than a child’s Christmas list.

Sea Stack Sunset

“Sea Stack Sunset” from 2005 (Prints available for purchase – click on photo to order!)

Despite the seemingly endless new photographic opportunities this transition presented, I decided to start my photographic journey in Oregon in the same place I left off:  on the headland at Indian Beach at Ecola State Park.  It’s a place I’d been countless times before, and yet when I arrived on Tuesday morning, nothing, nothing, looked the same as 2005.

Upon coming to the realization that nothing, nothing, had remained the same, I smiled as big as the little girl who got everything she wished for on December 25.  In that instance, I mouthed the words as the wind whispered, “No man ever steps in same river twice, for it is not the same river and he’s not the same man.”  ~Heraclitus.

(Turns out Heraclitus’ quote applies to oceans and women too!)

I couldn’t have been happier to learn that in eight years, everything, everything, has changed.  Mother Nature altered the landscape such that I can no longer stand in the same place as I did before, thanks to landslides.   Those landslides pushed new rocks into the ocean, and each wave crashed a little differently on those new sea stacks.  It’s not possible for me to re-create the same compositions I did in 2005, even if I wanted to-I didn’t.

On top of significant natural changes and differing light/weather, I’m thankfully not the same person, photographer, artist that stood on that headland before.  I replaced my film camera long ago with two generations of digital cameras.  I now know what to do with a graduated neutral density filter.   I’ve embraced my love affair with the coast, despite living in the desert.  Endless experiences – conversations, readings, successes, failures, travels, and other inspirations – have challenged and changed my perspectives over time so that when I look at a scene I’ve seen before, I’m looking through an entirely different lens.

Ansel Adams summed it best:   “You don’t make a photograph just with a camera. You bring to the act of photography all the pictures you have seen, the books you have read, the music you have heard, the people you have loved.”

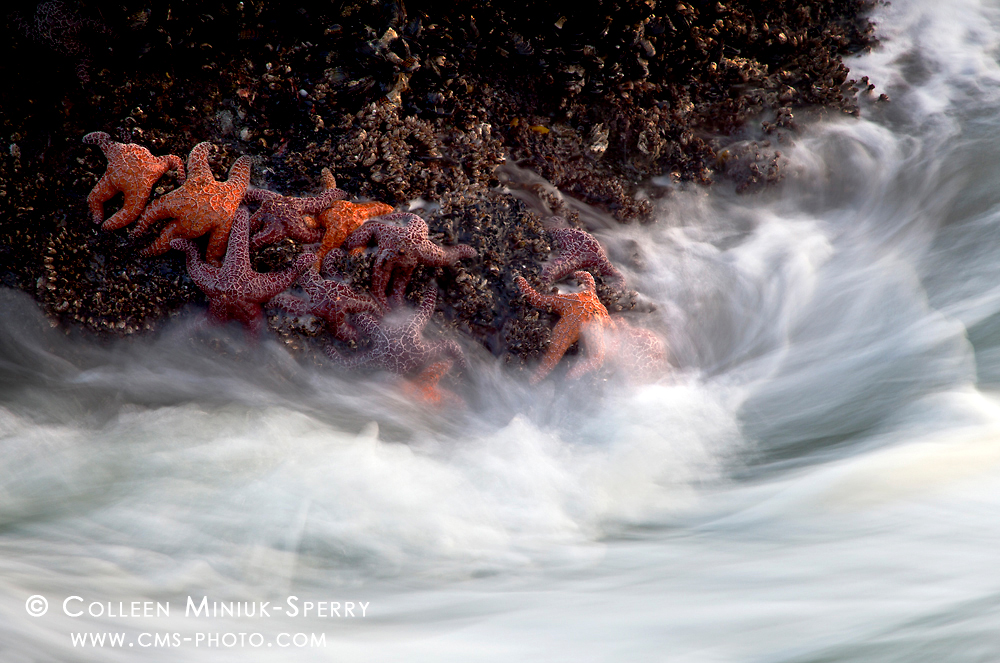
Hang On!

“Hang On!” Ecola State Park, Oregon (Prints available for purchase – click on photo to order!)

Whether we know it or not, as time passes, we and the world around us are constantly changing.  But, neither change nor creativity needs to be a passive activity.  If we seek to create new images in the same spots, we must change as a person.  Simply buying a new lens won’t cut it.  Oh sure, new gear can help execute new visions, but we need to start with new ideas and make different associations among the knowledge we already possess to see, and ultimately photograph, something new in places we’ve already been once or a hundred times.

Consciously and subconsciously, we can gain fresh thoughts everywhere and anytime, not just while photographing.  Some ideas how:

  • Reverse engineer photos you like to understand the process they used to achieve a specific result.  How’d they do it?  Then how would you do it differently?
  • Keep asking “what if.”  What if you used a different lens?  What if you climbed the hill for a more aerial perspective?  What if you saw the ocean as the desert, metaphorically speaking?
  • Devour books.  Not just photography books, but anything that tickles your passion and stimulates your brain.
  • Listen to music, watch movies, attend plays.  And then think about how you can incorporate the concepts and ideas you hear, see, and experience into your photography.
  • Talk with and exchange ideas with others.  Not just other photographers, but also those who know nothing about photography, who explore other activities and fields you enjoy, and think differently than you.  Surround yourself with people who know more than you.
  • Screw up.  Often.  Then learn from the experience to develop even more new ideas.
  • Engage with your environment.  An experience you have in one location can help trigger ideas in a different location.  Ride a bike, go for a hike, take a field-based class – whatever gets you closer to your subject.

So last Tuesday, I brought with me to Indian Beach all my experiences from spending 90+ days in Acadia National Park in Maine over the last four years, every critique I’ve conducted during all the photography workshops I teach, the entire process of writing a book about Arizona wildflowers, and more simply, even the songs I heard on the radio as I drove to Ecola State Park, among so many other things.  And as a result, my photographs look nothing, nothing, like they did in 2005.

What other tips do you have to see the same place with fresh eyes?

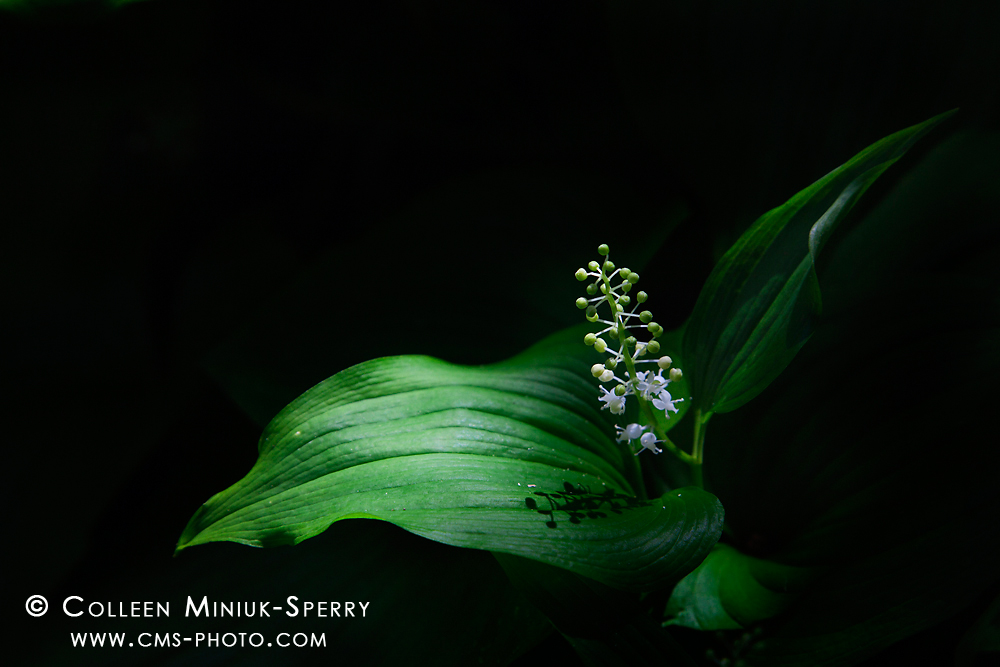
Spring Emergence

“Spring Emergence,” False lily-of-the-valley at Ecola State Park, Oregon (Prints available for purchase – click on photo to order!)

Jan 162013
 
Share

I have to spill the coffee beans…

This may be hard for some of you to believe, but…
I used to photograph food professionally. 

GASP!!

Not one to turn down a good challenge, I began shooting cuisine in late 2007 after seeing a stock call for “southwestern recipes” from a calendar company more famous for its landscape photography, and naively said, “Hmmm, that could be fun!”

For the three years that followed, fun it was as my husband, Craig, and I worked together to produce not one, not two, but three exclusive Southwest Cooking calendars.  In between developing new recipes and buying props for the calendars, I wrote restaurant reviews for a number of publications, including Arizona Highways magazine, who published my first restaurant article on one of our favorite spots in Arizona, The Cliff Dwellers Restaurant in Marble Canyon, called “Remote Possibilities.”  I also managed to collect a broad variety of commercial clients across Arizona to help with their advertising needs.

The food photography business was great on the pocketbook, but not so great for nurturing the soul of a nature lover – or for the booty, let’s be honest.  So in 2011, I stopped shooting alluring appetizers, enticing entrees, and delectable desserts to focus entirely on what I loved most, the Great Outdoors.

Though I’m no longer a shutterbug of sushi, I don’t regret spending those years getting a different flavor of photography.  In fact, I believe it’s made me a better nature photographer, as I still incorporate many of the techniques learned while photographing food during my outdoor escapades.  Specifically:

  1. Fleeting moments in nature disappear as quickly as fresh ice cream melts under hot lights.  For a single recipe featured in our calendars, we spent six to eight hours developing the recipe, arranging props, deciding on color schemes, and designing the set – “visualizing” – and only a few seconds photographing the final scene…which is about as long as most food looks edible in a studio setting.  Similarly, Mother Nature may only give us a few seconds to record “the” shot so prepare yourself for that special moment by drawing on paper or creating a picture in your mind of what you resulting photograph will look like – before snapping the shutter.
  2. If a photograph is truly worth 100o words, don’t use just 999 of them to convey your message.  During the extensive set designing process, we intentionally and precisely placed every single sesame seed, slice of lime, and sprinkle of cilantro in an exact location.  Before snapping the shutter, we studied every corner, the edges of the frame, and the visual relationship between the elements to ensure the scene appeared exactly as we wanted to convey exactly what we wanted.  Although changing moments in nature sometimes don’t allow a six to eight hour review of your composition, scan your frame before making the image to ensure you haven’t inadvertently included out of focus branches, overly lit areas on the edges of your frame, or anything else distracting from delivering a clear visual message.
  3. If the sesame seed doesn’t stay where you want when you move it, glue it.  Besides superglue, I’ve used glycerin, hairspray, soapy water, motor oil, mirrors, and a host of other hidden props to make a plate of food look presentable.  No matter your subject, once you have a clear vision, do whatever it takes to make it a reality (within legal and ethical boundaries, that is).  Put a shower cap over your lens to create an ethereal mood, hire a pilot to help you get an aerial perspective, or use a tongue-switch for hands-free operation of your camera while riding a bike (you’d be amazed at the stories you can tell about using a tongue switch!).  Being a persistent, creative problem solver pays off.  I’m currently imagining using the Cloud Machine to resolve my clear blue sky “dilemma.”
  4. Like a smooth, buttery Chardonnay, rocks, trees, and water don’t bite, so get closer.  If you think you’re close enough, if feasible, take two steps forward while keeping the same focal length of lens on your camera to eliminate extraneous details and keep your visual message clear.  Note:  Wildlife and people can bite so attach a teleconverter to a longer focal length lens instead of trying to get in their face.
  5. A normal-sized tostada looks more tantalizing on a tiny plate than on a big plate.  By tweaking proportions, we were able to draw attention to what seemed to be an abundant and attractive portion size.  When you aim to modify the relative size of natural objects, tap into the perspective distortion a wide-angle lens offers to make a bush or other object in the foreground look excessively large in comparison to its surroundings.  Or use a telephoto lens to compress two distant objects, making them seem closer together than they truly exist.
Have you recently tried photographing something outside your comfort zone?  What experiences and learnings have you had in photographing something other than the outdoors that eventually affected your nature photography?  We’d love to hear your stories and tips in the comments below!

Nov 152012
 
Share
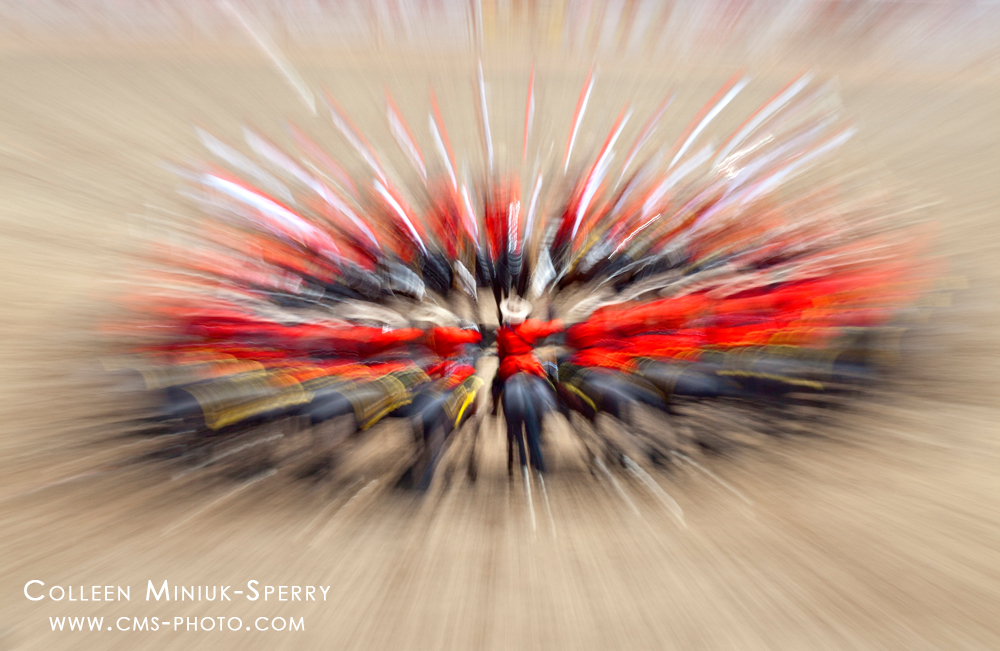
The RCMP Musical Ride

The RCMP Musical Ride from the 2012 Calgary Stampede in Calgary, Alberta, Canada. Prints available – click on photo to order!

I’d have to look it up in the rule books, but it’s potentially sacrilegious to visit Canada and NOT photograph the world-renowned Royal Canadian Mounted Police (RCMP).  Keeping this in mind as I prepared for my July 2012 visit to Alberta in support of the first Through Each Others Eyes Arizona-Alberta exchange, I naturally put photographing a Mountie in a flashy “Red Serge” uniform towards to the top of my shot list.

But it wasn’t just a portrait of these fine servicemen and women I was seeking.  No, no, the photograph needed to tell an intriguing story about the RCMP.  But what did that mean?  Hmmmm….

After some pre-trip research, different ideas danced in my head until we arrived at the Calgary Stampede Stadium in July 2012.  There, I had the honor of seeing my first RCMP Musical Ride during the 100th Anniversary of the Calgary Stampede, thanks to the efforts of our hosts and fellow photographers Peter Carroll, Royce Howland, and Kerry Smith.

To open this historic rodeo, thirty-plus RCMP members – each riding an elegant horse  – flawlessly moved through an artistically choreographed series of formations and traditional movements within the dirt arena.  With obviously much precision, skill, and teamwork, the galloping horses and straight-backed riders holding stately flags somehow didn’t get tangled!

As I clicked away with fast shutter speeds during the event, I couldn’t help but feel all my frames were too static.  And there was absolutely nothing static about what I was experiencing!

Hastily, I visualized a new approach, one that would allow me to record the impressive formations but yet include a distinct sense of motion.  Within seconds, I set my ISO to its slowest setting (ISO 50), spun my aperture dial to its smallest (f/36), and added a polarizing filter to the front of my 100-400mm lens to slow my shutter speed down as much as possible in the mid-day light.  The result was 1/10th of a second, which in my opinion seemed a little too fast to capture the sense of movement I desired for the scene.

I tried holding the camera still during the slower exposure while allowing the riders to create red streaks and patterns.  Didn’t like it.  I tried panning – a technique where you move the camera from left to right (or vice versa) – to help freeze the riders while blurring the background.  Didn’t like it.  I was quickly running out of tricks…and time!

Then, towards the end of the performance, the troop gathered into the “Dome” formation, where all the riders form a circle and then lower their flags into the center.  Keeping my settings the same, I focused on a single rider in the front with my lens zoomed all the way out, then physically pulled the lens back during the 1/10th of second exposure (referred to as a “zoom pull” or “lens pull.”  You can also recreate this effect in Adobe Photoshop under Filter/Blur/Radial Blur).

Luckily, the combination of the slow shutter speed and zoom pull technique allowed me to capture more energy AND enough structure to provide much-needed context in this more abstract view of the RCMP Musical Ride.  Though my visualizations evolved over time, I felt this perspective successfully told an intriguing story about the RCMP Musical Ride and decided to include this photograph as one of my 20 selected prints to display during the recent Through Each Others Eyes Exhibition at the Art Intersection Gallery in Gilbert, Arizona. (Exhibitions in Alberta, Canada coming your way in early 2013 – stay tuned for more details!)

Technical info:  Canon 5DMII, 100-400mm lens at 285mm zoom-pulled, f/36 @ 1/10th of a second, polarizer, basic post-processing.

Oct 242012
 
Share

“Wait, why are there so many stars out?” I murmured to myself as I stepped out of our Lake Louise-based hotel door and into the darkness.

Just a mere six hours before our 4 am wake-up call, Royce Howland and I had dashed around Banff National Park in his 4Runner, watching mammatus clouds form overhead as we chased violent, fast-moving thunderstorms whirling through the scenic valley.  Serendipitously, we found ourselves capping off a thrilling evening with our cameras in the perfect position along the Bow River as the northern sky exploded into a fireball of color.  After experiencing such a spectacular show by Mother Nature, we asked ourselves, “What would the morning bring?!”

As I peered at the speckled sky out the car window, my hopes for capturing moody storm clouds at Moraine Lake – our sunrise destination – disappeared as fast as the coffee did that morning…

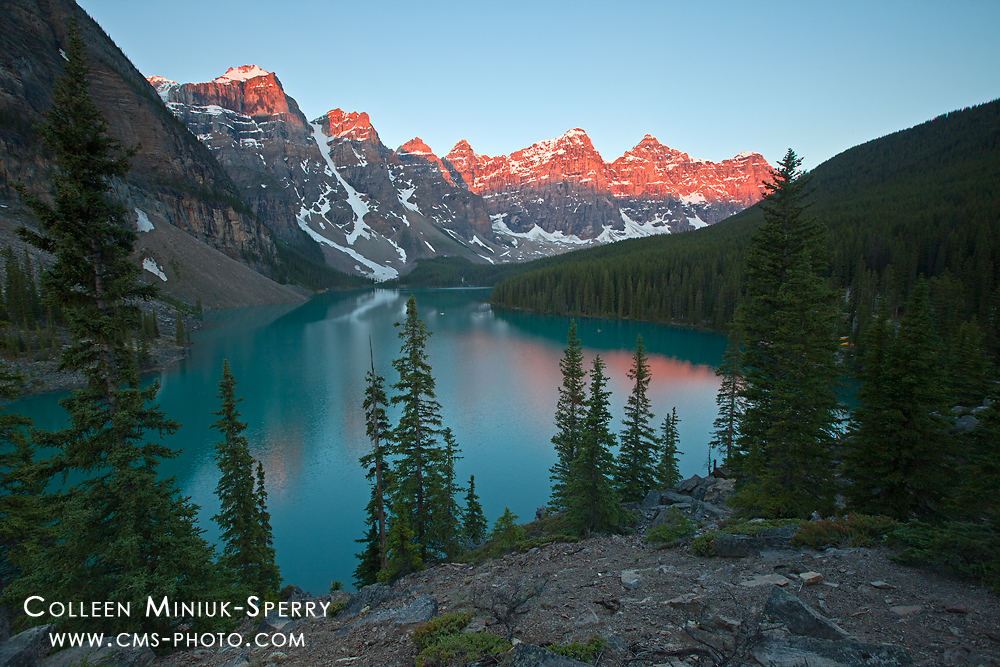
Image #1:  Though arguably half-asleep, I dragged my gear up the pathway to the top of the rock pile overlooking this gorgeous lake and found a high point to perch my camera.  I started the morning with the classic, ho-hum, “everybody’s got it” composition as the sun broke through a small sliver of clouds on the eastern horizon.  I normally try to avoid cliche shots, so what was my excuse for kicking off the shoot like this?  I’ll take “Photography While You’re Still Half-Asleep” for $500, Alex!  Jeopardy jokes aside,  this image is definitely not what I wanted to say about this iconic place, but it served to get the creative juices flowing in what I considered to be less than desirable conditions...at o-dark-thirty…

Sunrise at Moraine Lake, Banff National Park, Alberta, Canada

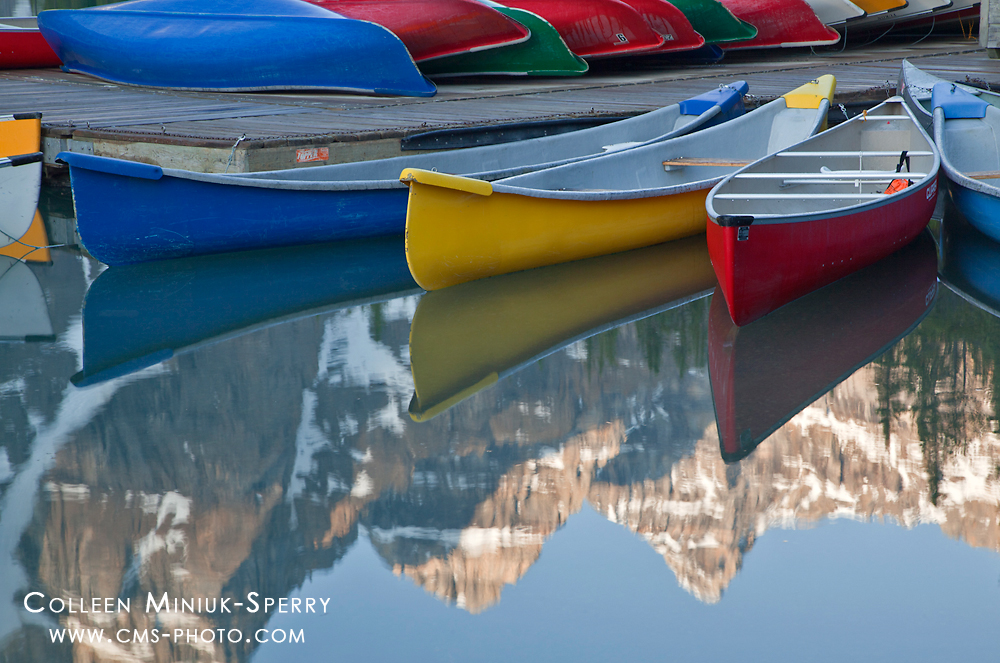
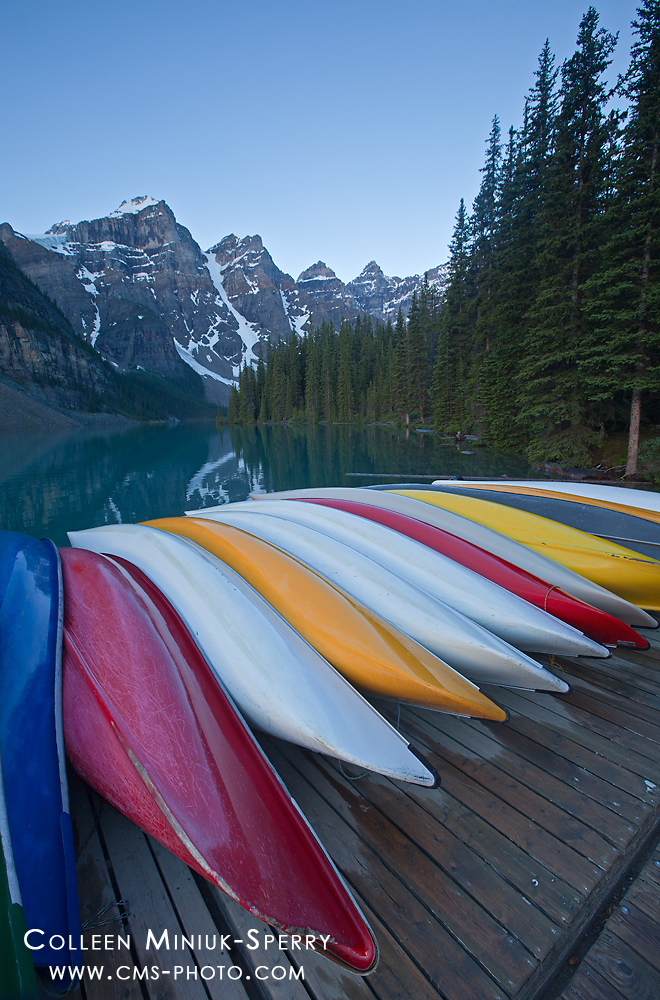
Image #2: I needed some new ideas and inspiration – image #1 wasn’t going to cut it.  Immediately after snapping this shot, I noticed a small canoe leaving the dock (located on the bottom right hand side of the frame in the image above).  Since the broad landscape scene wasn’t evolving to my tastes, I hiked down the hill to see if I could record people interacting with nature instead.  Seemed like an easy way to capture something different here!  But as I approached the dock, I quickly acknowledged that finding people awake, active, and super excited about the papparazzi at 5 am is sometimes hard to come by…but there were lots of colorful canoes willing to pose for me!  With the sun tucking behind another cloud, the subdued conditions afforded me more time to undauntedly play and practice different wide-angle compositions along the shoreline, including this one of the resting boats:

Image #2

Image #3: The diffused lighting helped the colors of the canoe stand out, but I was less than enthusiastic about the boring clear blue sky and the lack of direct lighting on the peaks in the background.  Out they go!  To help eliminate the sky and background, I switched to my telephoto lens and repositioned myself onto a bunch of boulders lining the lake near the dock.

By taking the unimportant elements out of the frame, I was able to then emphasize the canoes and the mirror-like reflection, which resulted in image #3 below (just as the sun peaked out again!):

Image #3

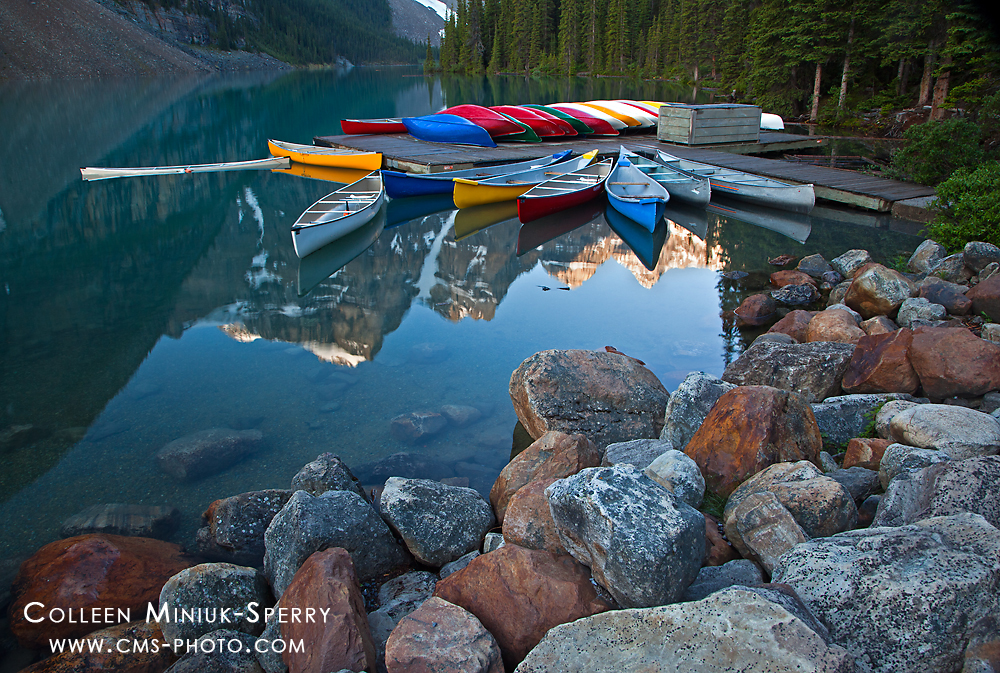
Image #4:  My eyes widened with delight as I reviewed image #3 on my LCD – we’re getting warmer!  (At least the compositions were; this Arizona-based desert rat froze to death out there.  Just look at all that “weird” white stuff in the mountains!)  The reflected provided much needed context about where I was photographing without having to include a background I didn’t like.  That said, I felt the composition in image #3 was too tight, so I put my wide angle lens back on and stepped off and behind the rocks for a broader view to record image #4:

Image #4

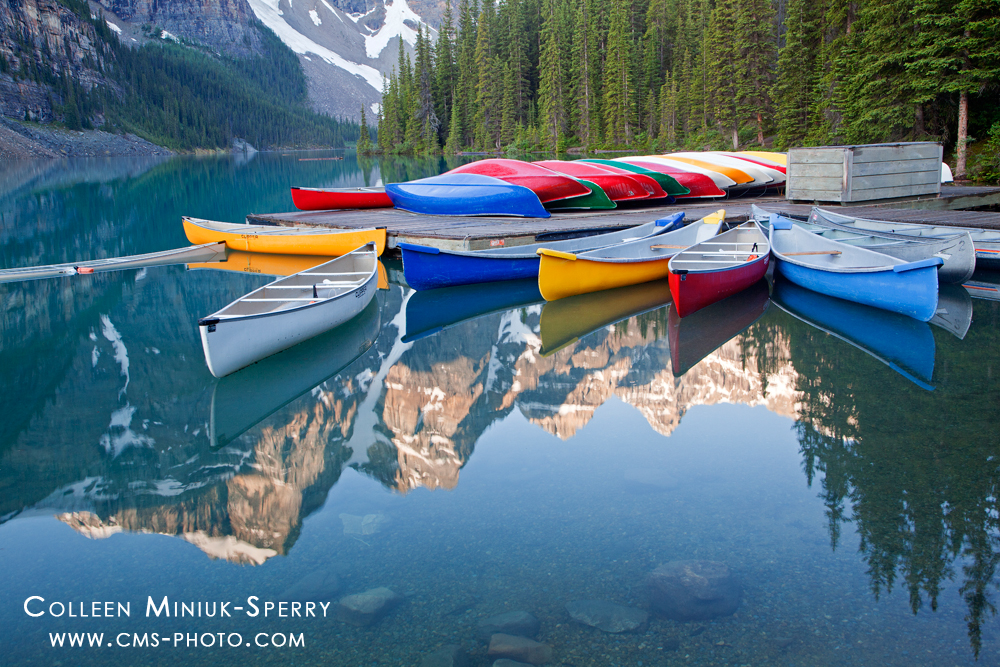
Image #5:  At this point, I felt a little like a character in the “Goldilocks and the Three Bears” story – image #3 felt too tight but image #4 felt too broad.  I needed something “just right!”  By adding foreground, the scene appeared to have more depth, but the rocks didn’t really add to the story I was trying to tell.  The part I liked most fell right in the center of the composition of image #4, so I composed a little tighter with my wide angle zoom lens.   And voila!  Image #5 resulted and is the image I have selected to display in the 1st Through Each Others Eyes Arizona-Alberta Exhibition: (blog continues after photo)

Image #5:  “Reflections at Moraine Lake” to be featured in the upcoming 1st Through Each Others Eyes Arizona-Alberta Exchange Exhibition

Now that you’ve seen a sneak peek of one of the images I recorded from my time in Canada, I hope you plan to join us for the Artist Reception on November 7 from 7-9 pm at the Art Intersection Gallery in Gilbert, Arizona to see not only my 19 remaining selections, but also how my Through Each Others Eyes travel partner Ken Ross interpreted Alberta differently than I did and how Alberta-based photographers Royce and Peter Carroll viewed Arizona during their 10-day stay during our cultural photography exchange.  For more information about the exhibition and artist reception, please visit the TEOE website at www.teoe.org/?page_id=829.

Oct 192012
 
Share
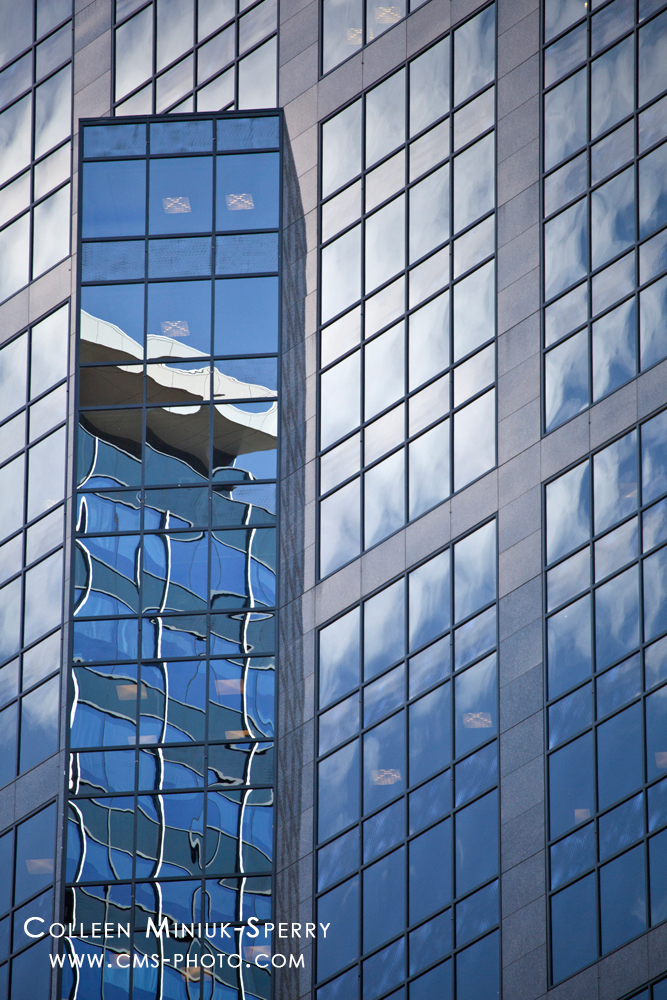
Reflections of Calgary

Reflections of Calgary; Calgary, Alberta, Canada (Click on image to see larger; prints available!)

During my 10-day visit to Alberta, Canada last July to support the Through Each Others Eyes cultural photography exchange, my right pointer finger enthusiastically clicked the shutter over 4400 times.  While it was thrilling at the time to blast away at seemingly anything and everything that caught my eye, it created a gi-normous pile o’pixels I must now wade through to select a mere 20 photographs to display for the upcoming exhibition.  For the non-math majors in the crowd, that means picking out the top 0.5%!  YIKES!

Out of the thousands of images we might capture during a photographic outing, how do we decide which ones to keep and which ones to throw out?   No doubt, editing and critiquing our own photos can seem like an arduous quest – one that has no right or wrong answers – but here are some tips to help you identify your “keepers” in your collection:

  1.  Get organized.  Invest in an image management software like Adobe Bridge, Adobe  Lightroom, Apple Aperture, or the applications that arrived with your camera on a disc (e.g. Nikon Capture or Canon Digital Pro Photo) to help establish a centralized location to easily and consistently conduct your self-critique.
  2.  Bury your obvious screw-ups.  We all got ‘em, but the world doesn’t need to know about ‘em!  (Thank goodness we don’t track batting averages in photography!)  Once you’ve downloaded your images into your chosen software, liberally use the delete key to immediately eliminate frames that are out of focus, badly composed, poorly lit, unintentionally overexposed, and severely underexposed.
  3. Form a first impression.  Scan your images quickly for “keepers.” Simply make a snap decision as to whether your eyes enjoy the photograph or not.  Mark any frame you like (e.g. using the star rating in Adobe Bridge) to tag it for future in-depth analysis.
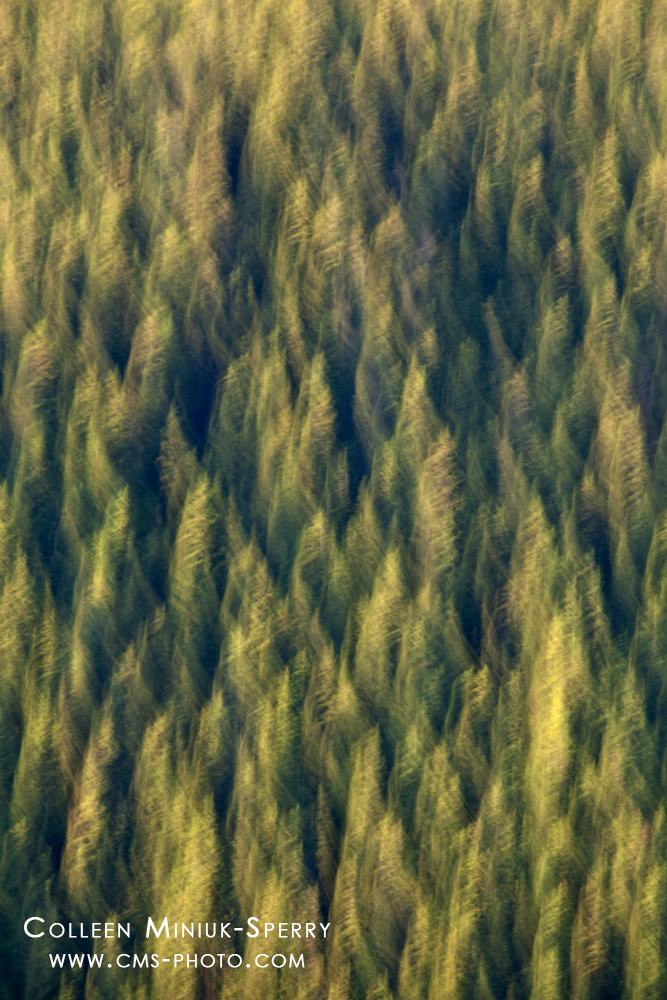
  4. Whichever Way the Wind Blows

    Whichever Way the Wind Blows; Banff National Park, Alberta, Canada (Click on image to see larger; prints available!)

    Unplug your emotions.  Like your mother told you growing up, first impressions aren’t always correct.  After doing an initial evaluation, let your images “rest” for a day, a week, or even a few months to disconnect emotionally from your photographs.  Once you’re back in the saddle, turn your flagged images upside-down so they are less recognizable to your brain and therefore less connected with your recollection of the influential experiences you had while making the shot.

  5. Get out the butcher knife.  Start hacking away on the technical aspects of your image.  Does the scene convey a sense of depth through the chosen depth of field?  Is the horizon level and positioned away from the middle of the rectangular box?  Could you simplify the composition withou

    t losing context?  Is the light illuminating the subject matter and helping to create shape, depth, and contrast?  Are there any overly bright areas or out of focus areas that are distracting to the eye?

  6. Say something different.  A technically-perfect image might feel boring and be ineffective in visually communicating your desired message.  Viewers will react to your images if they contain subjects and stories that are clear, fresh, intriguing, emotionally-charged, or even controversial.  Does your photograph showcase an unrepeatable moment?  Does it convey a specific mood?  Will your capture provoke thought, dig up memories, or spark new meaning with your viewers?
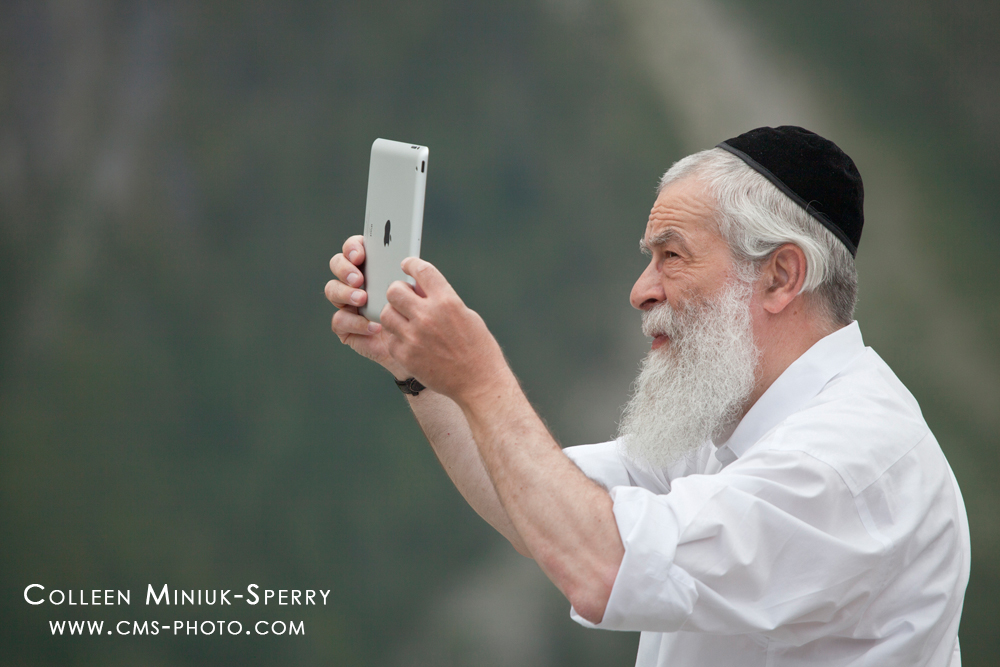
  7. Taking It All In

    Taking It All In; Icefields Parkway, Alberta, Canada (Click on image to see larger; prints available!)

    Remember, “To each their own.”  What may be the “best” photo for one audience may not be for another so you might find yourself keeping different photos for differing purposes.  For example, you may capture a pleasing iconic Grand Canyon shot good enough to hang on your wall because it reminds you of your last family vacation but not appropriate to send to a magazine who isn’t interested in publishing a story on the “big ditch” in the next 100 years.

  8. Get a brutally honest second opinion.  Once you’ve narrowed down your choices, hand your butcher knife to a trusted friend, family member, or photographer who will gladly use the blade on your work.  Listening to others’ insights can help trigger new ideas and highlight aspects you might not have previously considered.
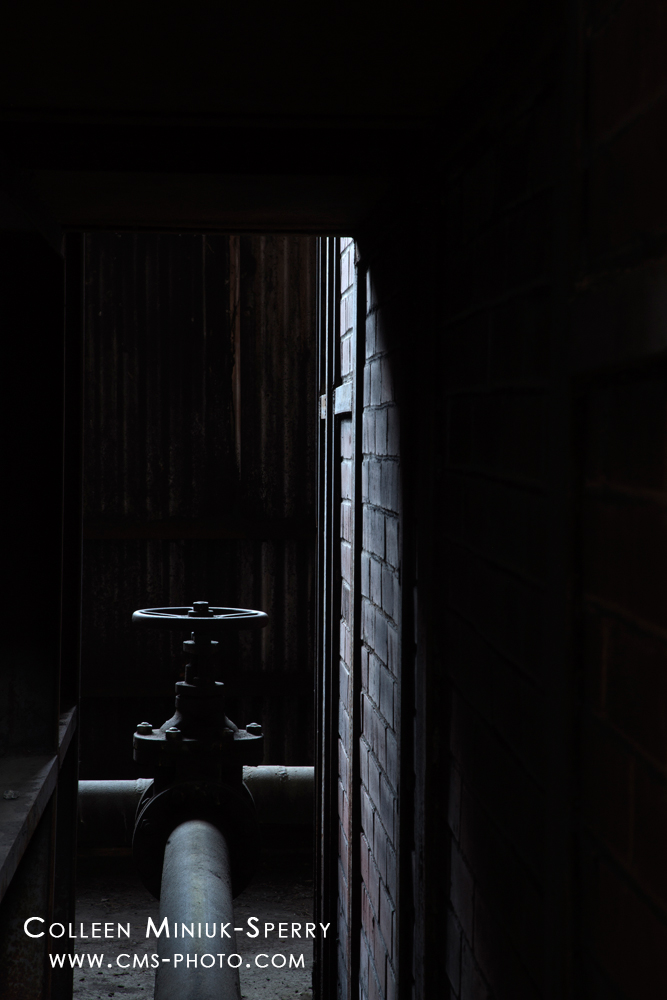
Valve at Nordegg Mine

Valve at Nordegg Mine; Nordegg, Alberta, Canada (Click on image to see larger; prints available!)

While assessing your own work can be a time consuming, grueling task, being a harsh critic can help not only pick out the winners from your digital dump, but also refine your photographic techniques and polish your unique creative vision over time.

By using this process, my Alberta pixel pile yielded a 20-print story I can’t wait to share at my upcoming exhibition.  And the images in this post did NOT make the cut (even though I like them!)!  In my next blog post, I’ll give you a sneak peek into one photo that did!

If you’d like to see the other 19 I selected, as well as the photographs from my fellow Arizona-Alberta exchange partners-in-crime – Ken Ross, Peter Carroll, and Royce Howland – then please join us on November 7 from 7-9 pm at the Art Intersection Gallery in Gilbert, Arizona for our exhibition’s Artist Reception. For more information, please visit www.teoe.org/?page_id=829.

Sep 052012
 
Share

One of the most enjoyable and valuable educational aspects of the Arizona Highways Photography Workshops (AHPW) – of which I’m honored to lead a number of each year – is the post-workshop critiques.  Though we conduct image review sessions during the workshop, a post-workshop critique allows participants additional time to edit and process their photographs before submitting to their instructors for additional feedback after the class concludes.

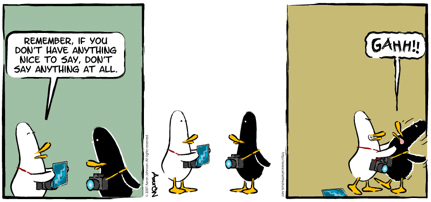
Whether we complete these productive reviews during or after the workshop, we analyze the positive aspects of each student’s images and constructively outline ideas for how to potentially improve them from a technical and artistic perspective.  Kind of like this:

What the Duck

“What The Duck” comic strip copyright and courtesy of the author and artist Aaron Johnson at http://www.whattheduck.net.

All choking and joking aside, the point of the evaluation is to go beyond answering the simple question: “Do you like this picture?”  The true value of the exercise comes in when we define in-depth we WHY like and don’t like an image, which generates new ideas to sharpen our skills and polish our individual styles from our different answers.

Earlier this week, I completed the post-workshop critique for the recent Women’s Photography Retreat at the North Rim of the Grand Canyon.  Although I’ve shared image-specific comments for 45 images, I thought I’d share a summary of the three main take-away’s from this particular critique session:

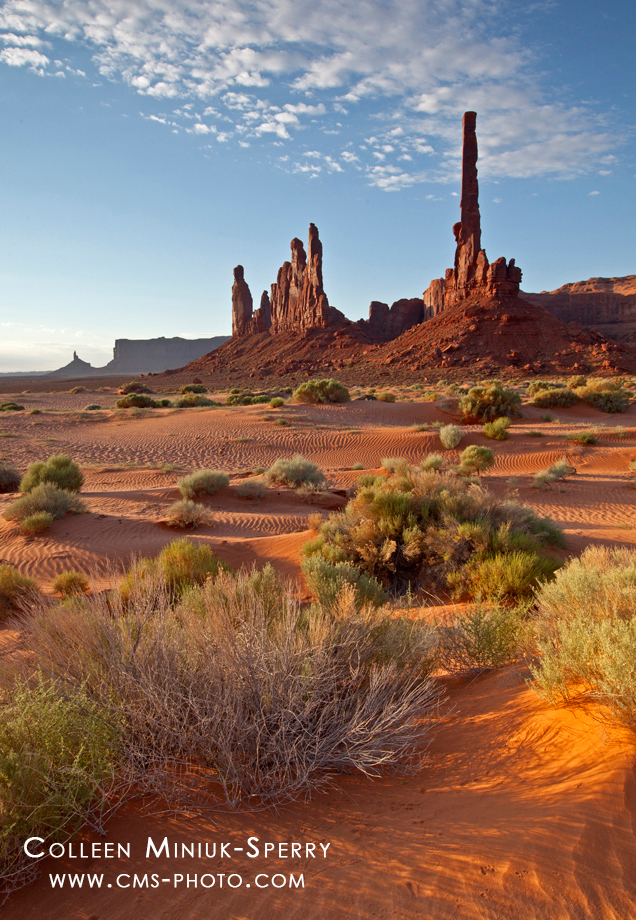
The Totem Poles and Yei Bi Chei at Monument Valley Navajo Tribal Park, Arizona

Example:  Tilting my camera down emphasizes the sandy landscape and allows the sky to become a less dominating backdrop. By composing so that the line of bushes and the patterns from the wind-blown sand lead my audience into the frame, it helps guide the eye through the landscape towards my primary subject: the side-lit Totem Poles at Monument Valley. Do you agree?  How would you critique this image?  (Prints available! Click on photo for a direct link).

  1. “Half and half” works well in coffee, but not always in landscape images. Unless you aim for symmetry among the various elements within your frame (e.g. a reflection of mountain in a lake), placing the horizon line in the middle of your frame will only serve to divide your viewers’ attention.  Should they look at the land or the sky?  Make it clear:  If the sky is more interesting, tilt your camera up and place the horizon line at the bottom

    third of the Rule of Thirds tic-tac-toe grid.  If the land is what caught your eye, then tilt your camera down so the horizon is at least at the top third of the grid.

  2. Let there be light…oh, and a strong subject too!  Is there anything better than sitting on the edge of the Grand Canyon and recordings the rays of the setting sun break through the clouds, turning the landscape and sky into a fiery mix of orange, pink, and purple? (In more technical terms, we call this “super yummy light.”)  YES!  That same spectacular show by Mother Nature happening over a well-thought-out composition!  Good light alone is often not enough to make a great image.  Similarly, a strong center of interest without interesting light may lack shape, contrast, and mood.   To capture the best subject in the best light, visualize strong compositions first in the field, then return to work the scene when the light is just right.
  3. As “all roads lead to Rome,” all lines should lead to somewhere important.  Lines can direct your viewer to through your image, but the payoff at the end of the line shouldn’t be a one-way ticket out of your frame.  To keep the viewer’s interest, ensure the visual path doesn’t extend beyond the edge of your frame and leverage diagonal, converging, S-curve and other style lines to pull your viewer not just into your frame, but also somewhere interesting.

If you’re a past student of AHPW – not just of this specific workshop, but any of them – you have the ability to view my image-specific comments by logging into the Arizona Highways Photo Workshops Smugmug site with the password you received during your workshops and selecting the “Women’s Photo Retreat” folder.  You also have the ability to leave comments as well, so hop on the site and let’s here you’re thoughts!

If you aren’t a past student of AHPW, there’s no need for you to feel left out.  If you’d like input on one or more of your images, stop by my page and submit your shots at GuruShots at www.gurushots.com/colleen-miniuk-sperry.

In closing, I’d like to thank the ladies who submitted their beautiful photographs for critique:  Denise, Deanna, Christy, Amy, Julie, Tamara, Sue, Pearl, and Jeanne.  As Abigail Adams once said, “Learning is not achieved by chance, it must be sought for with ardor and attended to with diligence.”  May we all embrace learning like these and all of the women who attended the Women’s Photo Retreat have.

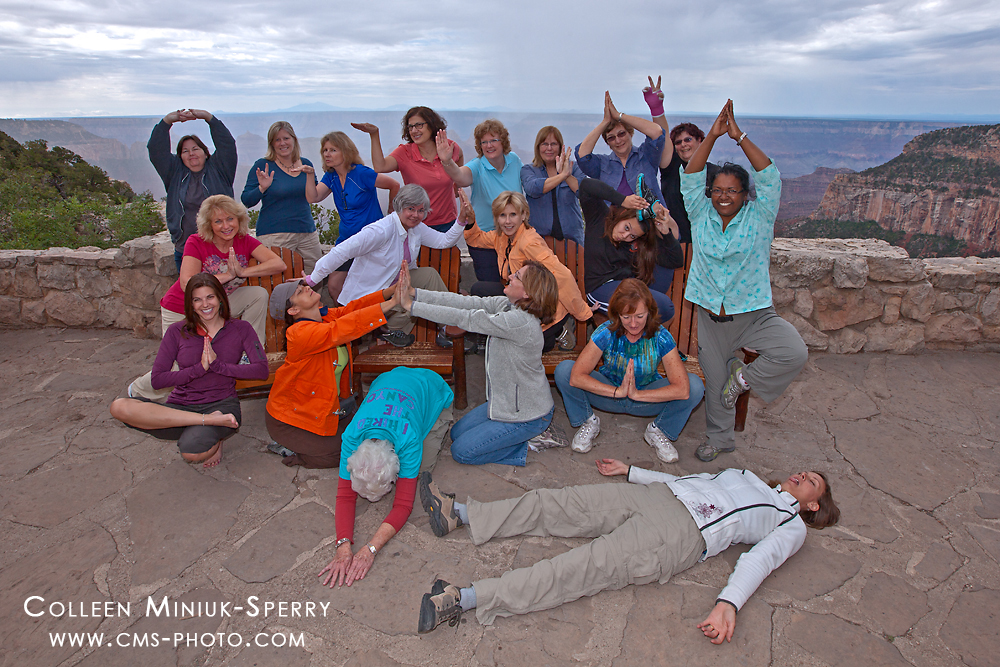
AHPW Women's Photo Retreat:  Silly Group Photo

The attendees of the AHPW Women’s Photo Retreat having a “Zen” moment during our Group Photo.  I’m not sleeping, I’m merely practicing “Corpse Pose.”