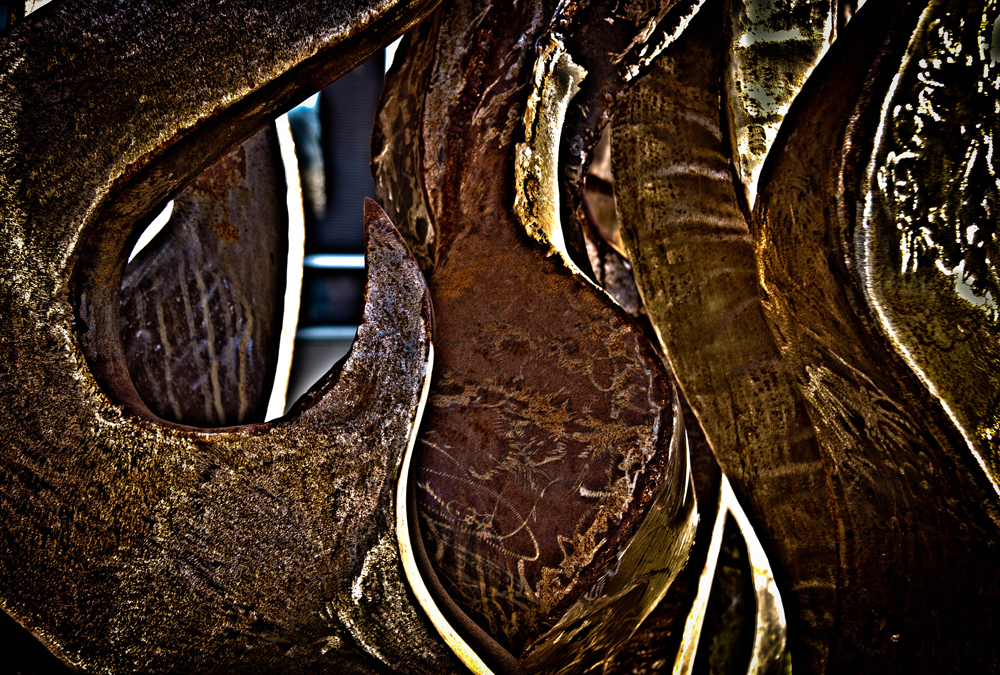
Photograph copyright Tracy Valgento
Hello! First off I wanted to say how happy I am to be featured on You Can Sleep When You’re Dead! My name is Tracy Valgento and I wanted to share with you a tutorial that puts a new spin on art photography.
This is an HDR (High Dynamic Range) image of a bronze fire sculpture. (Don’t know what that is? Click here for a great instructional page on HDRs http://www.cambridgeincolour.com/tutorials/high-dynamic-range.htm) While HDRs are traditionally used for sunsets and landscapes, I wanted something unique. I was inspired to take this image after seeing an HDR of a bronze Buddha in a Thai temple. It was so beautiful that it sent me into a creative tailspin!
The art of metal working is something I have never had an interest in doing, but that I admire greatly. For this image I wanted to portray the ‘grit’ of welding that gives metal sculptures their character. Additionally, I wanted an abstract effect when I shot the image, hence the tight crop that allows for the flames to be visible, but still left open for viewer interpretation.
My method: This picture was taken with a Canon 30D and the 18-55mm lens. This is an HDR image, which means that it is a compilation of three images at three different exposures mushed together in post-production. Before taking the picture, I set my camera up on a tripod (you want to make sure to have exactly the same picture 3x over to avoid “ghosting”, which happens when everything isn’t lined up). I then set the camera to the “drive” setting on my camera and set up the exposure bracketing. I set the camera to take pictures at three stops so that one was overexposed (too bright), one was normally exposed and one was under exposed(too dark). (You can set it to include the half stops as well to equal five, but this is not crucial to the effect.) Then I hit the shutter. In one click I had all the shots I needed to go home and make an HDR!
For post-production I usually default to Lightroom, but in this case Photoshop is really the best tool. I uploaded the images to Lightroom and merged them into one stack, this makes for easy transfer to Photoshop via the “edit in” function. Once the images were in Photoshop I began the HDR magic!
Open the “Merge to HDR” tool, found under “File> Automate” in the top menu, and click “OK” to compile the images. It will take a while to process depending on how fast your computer processor is butonce the image has compressed, you will see a combined histogram for your HDR with a variety of adjustment tools. For this image, I adjusted the detail extensively to show off the previously mentioned welding marks, and then boosted the black contrast on the image (a matter of personal preference). Once this is done, you want to make sure and compress the layers in Photoshop before you export and save!
About the Photographer:
I’ve always considered myself a creative person: I love to craft, cook, and sew, but most of all I love photography. My focus is on wedding, portrait, and lifestyle photography because it gives me so much joy to capture special moments in people’s lives.
Contact me at tracyvalgentophotography@gmail.com. Or if you are interested in my work, or would like to know more about me and my photography please check out the following:
My Facebook: http://www.facebook.com/pages/Tracy-Valgento-Photograpy/319808464800098?fref=ts
I also Pinterest, follow me there to get photo tips and tricks or see what inspires me: http://pinterest.com/tracyvphoto/photography
My blog: http://tracyvalgentophotography.blogspot.com (This is currently under review, but should be up and running soon!)
To read more about the Northern Arizona University “Behind the Image: Guest Blogger” project on our blog, please read the introduction on our April 15 post at youcansleepwhenyouredead.com/wordpress/introducing-the-nau-photography-students-behind-the-image-guest-blogger-project.
